Muscle pain straight up sucks. Whether that pain is from muscle soreness or an injury, stiff muscles and dull pain can slow you down.
Here at VSWI, we specialize in relieving pain using manual therapies. Our hand-on technique often includes Myofascial release, which involves putting gentle pressure on specific body locations to restore range of motion and ease pain.
In an ideal world, we'd all see Daniel multiple times a week to help ease the soreness, stress, and tension that we experience on a daily basis. Unfortunately, this isn't realistic for most of us, but all is not lost. Enter self-massage, a highly effective alternative and/or supplement.
While bigger tools, like the foam roller, are used to relax and relieve larger body areas, today we want to focus on something perfect for targeting those harder-to-reach areas: a Lacrosse Ball. It's also a cheap, portable tool you can keep with you on the go. We recommend keeping one in your car, purse, carryon, etc.
We often give a Lacrosse ball to our patients and prescribe at-home exercises to help speed recovery and prevent future pain. While we personalize and go over each set of exercises/stretches with each patient, we've compiled five different ways you can use a lacrosse ball for more effective myofascial release.
Perform each of the following exercises for up to 60 seconds. They can be performed before or after your workout, as well as any time throughout the day.
5 Ways to use the Lacrosse Ball

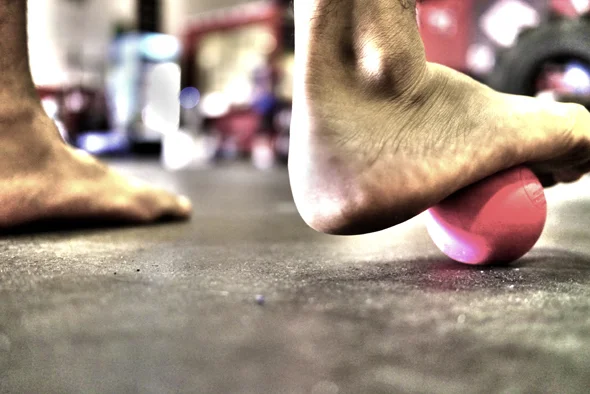
1. Feet.
Place the lacrosse ball under the arch of your bare foot and begin slowly rolling over it. The ball will provide instant relief from tight arches and also help those who suffer from plantar fasciitis. We recommend keeping a ball in a ziplock bag in the freezer for an after-work cold foot massage or storing one in your carry-on bag for your next flight.

2. Glutes.
In a standing position, rest the lacrosse ball between your glute and a wall with the ball directly over the area you are experiencing pain. Press your glute into the wall and begin performing circular motions in and around the area. Once the pain subsides, stop moving and increase pressure into the wall with the ball resting directly over the sore spot. Hold this position for up to 30 seconds.

3. Hips.
Lie on the side where you are experiencing tightness with knees bent 90 degrees and stacked on top of each other. Rest hands on the floor in front of your body. Raise your hip, place the ball directly under the stressed area, and slowly lower your weight back onto the ball. Begin moving your hips around to massage and release tension in the area. If the pain is too severe, stand up, place the tight hip closest to the wall, and place the ball over the tight area. Begin moving your hip around to massage the pain away.
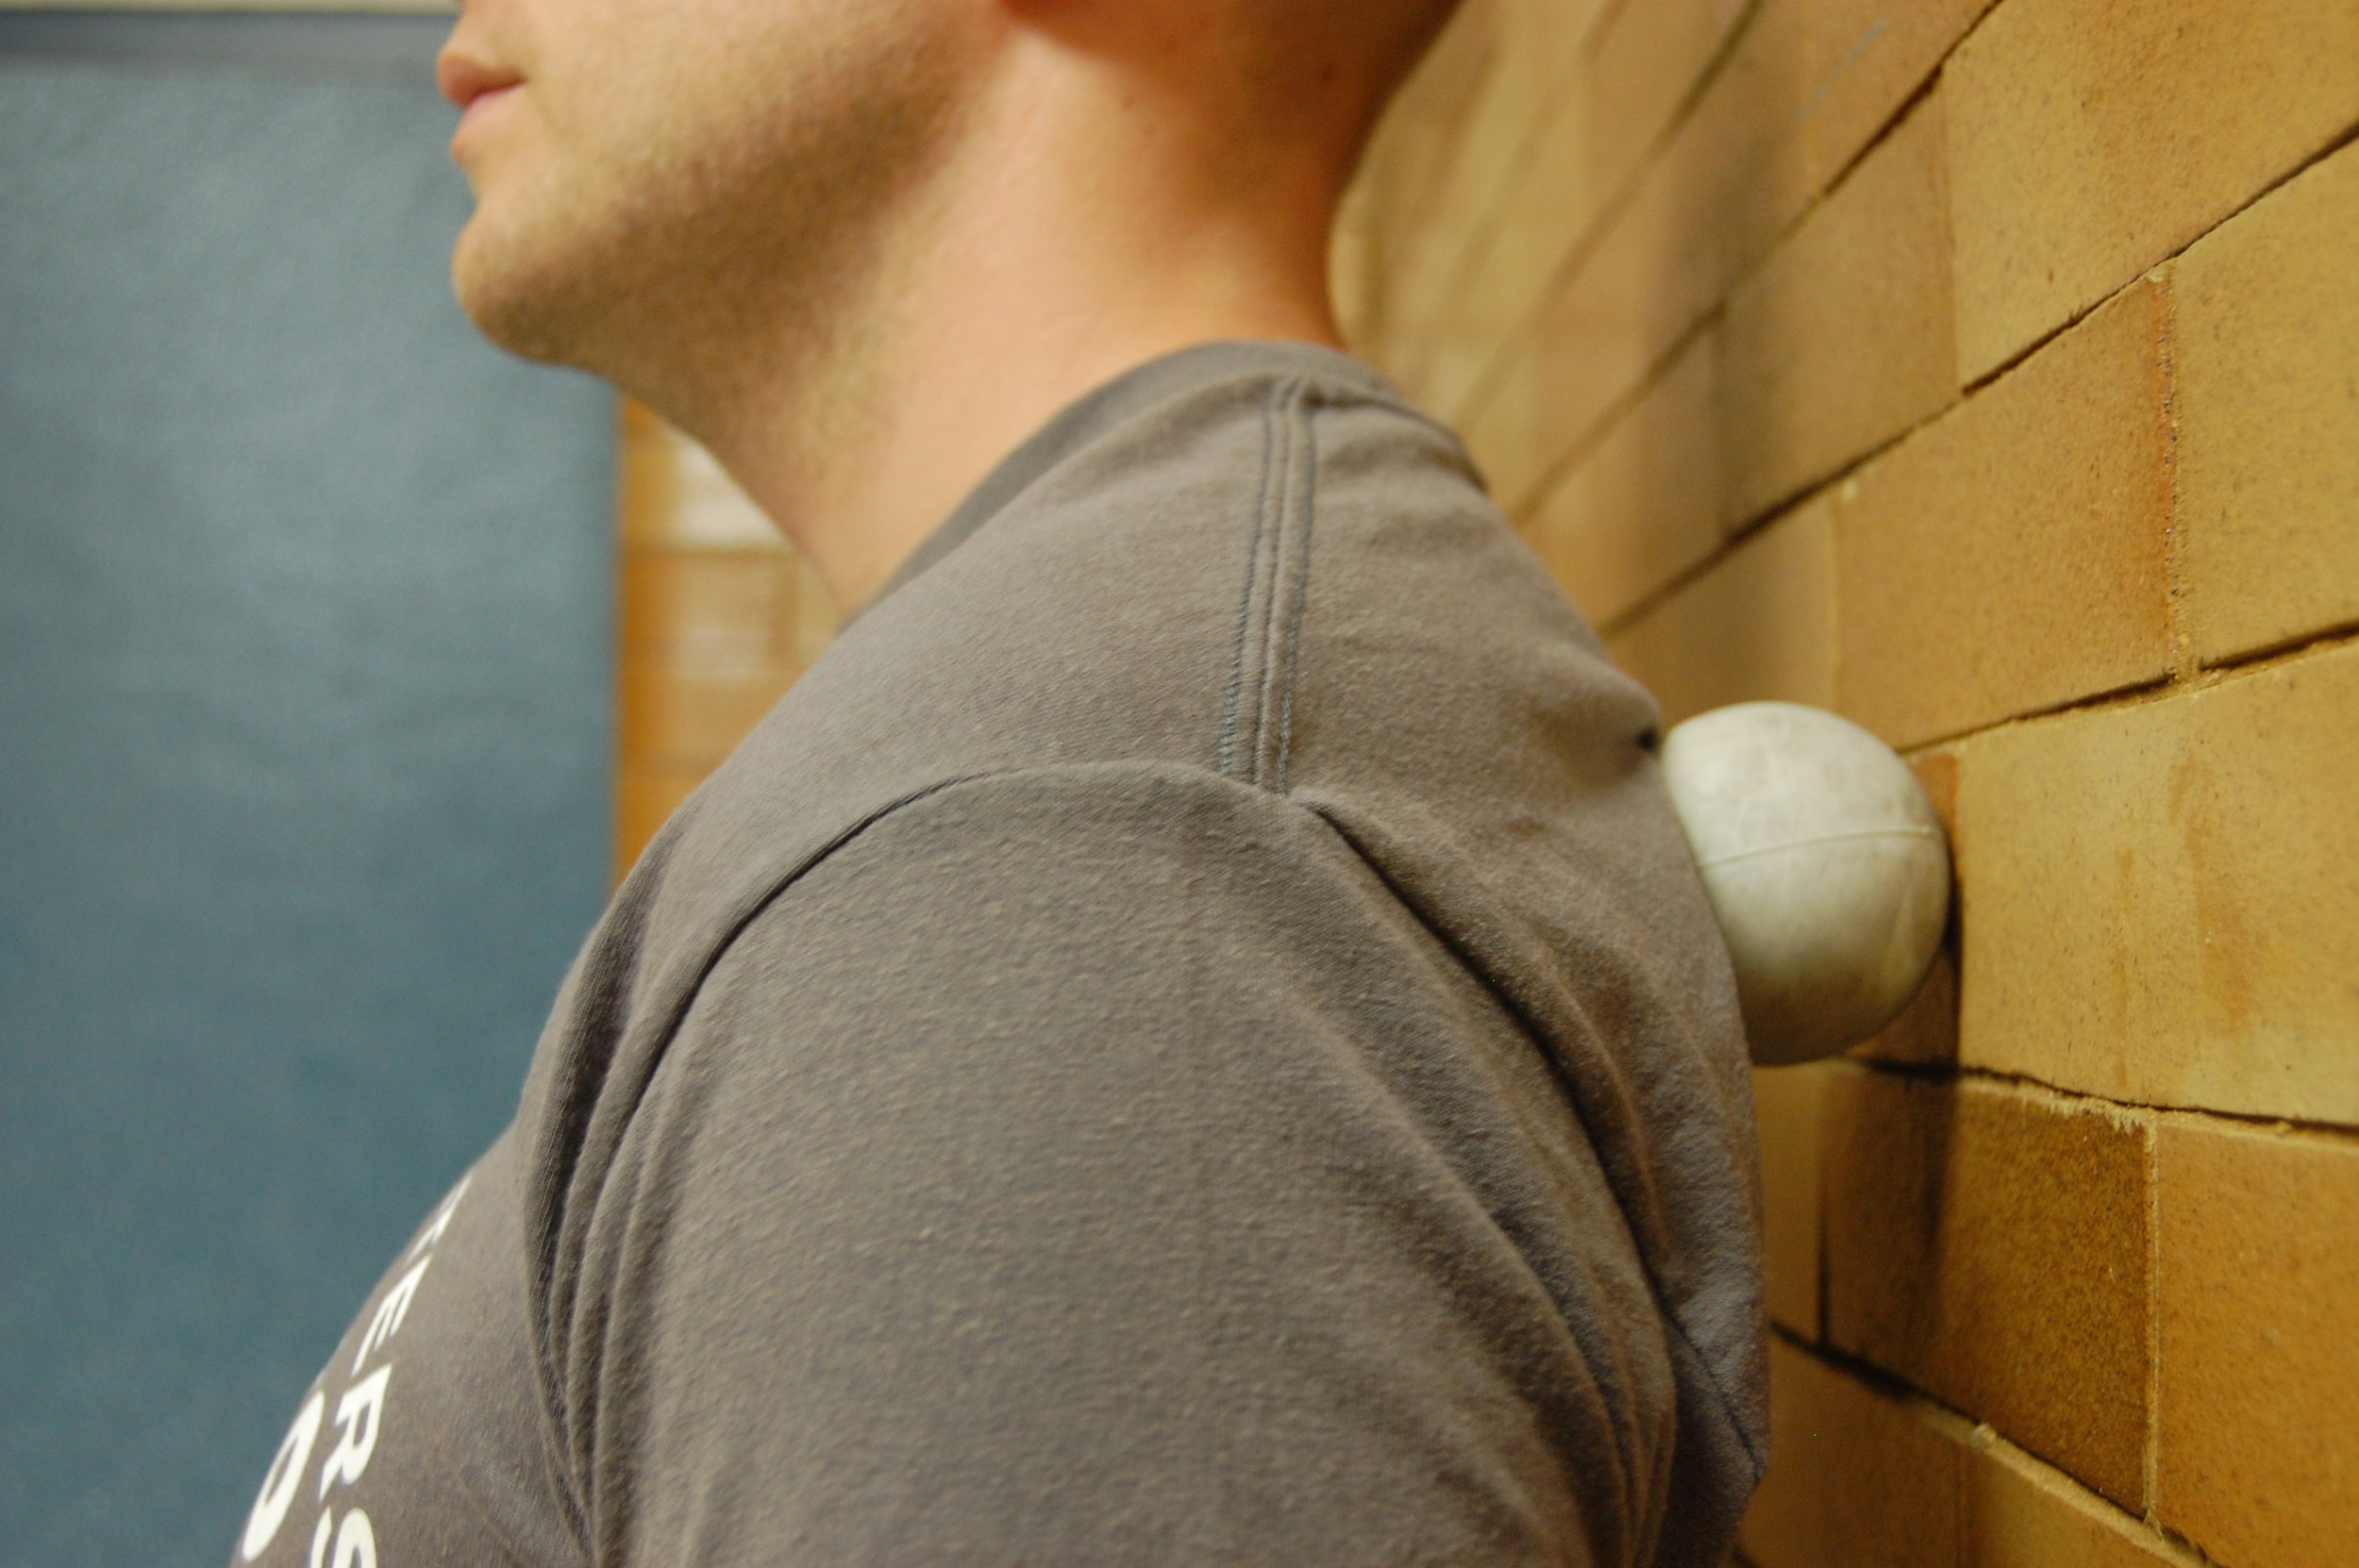
4. Shoulders.
Positioning the ball in this area can be tricky, so place it in an old stocking or sock to give you more control. Stand tall with your back close to the wall. Hold the end of the stocking or sock with one hand and, allowing the ball to rest between you and the wall, position the ball directly over the stressed area. Press your back into the wall. You can rest the ball over the area or perform small circular motions until you start to feel relief.
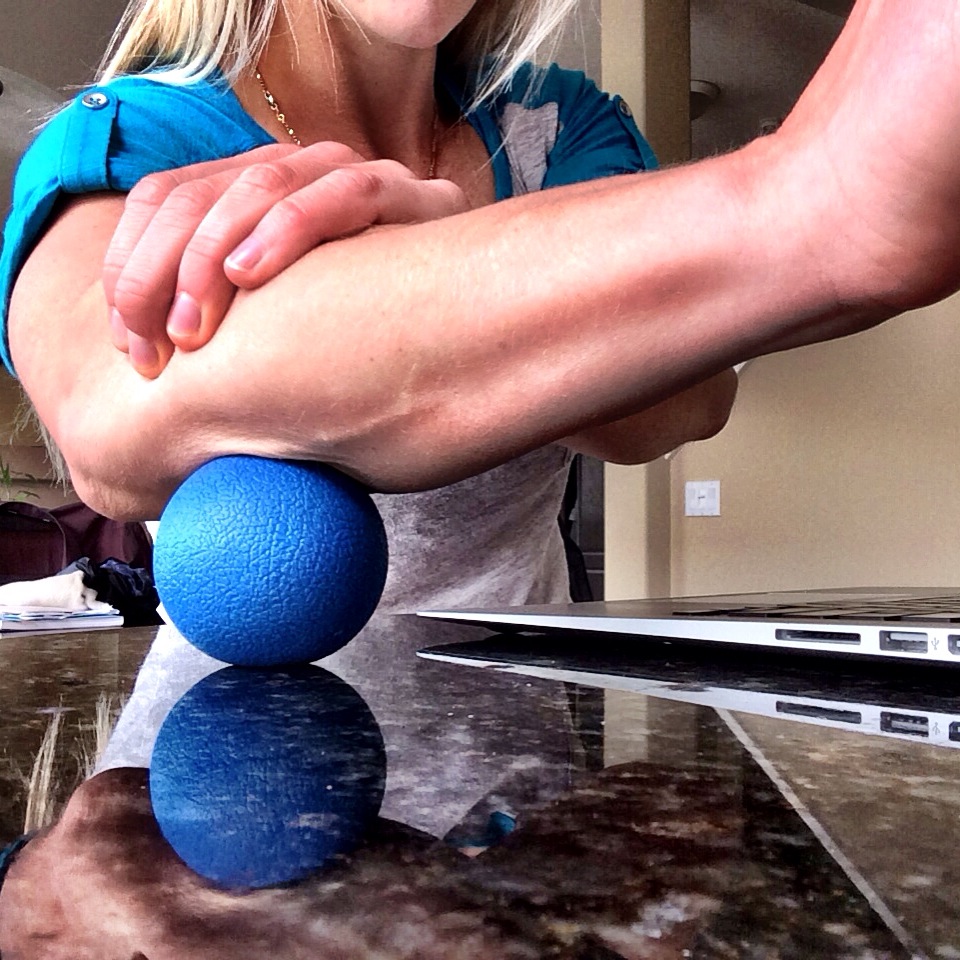
5. Forearms.
Sitting in front of a computer all day can wreak havoc on your forearms. If not properly stretched and strengthened, this can lead to carpal tunnel syndrome. Try these two ways to relieve the tension: Hold the ball in one hand and role it up and down the forearm, or place the ball on a desk or other flat surface and rest your forearm over the ball. Press your forearm into the ball and run it over the ball. I recommend doing this several times throughout your work day to relieve your muscles.
Try these at home then book an appointment for a more personalized plan to help keep your body at its optimum level.
Happy rolling!
